Wednesday, 2 March 2016

NASA Guide to Air-Filtering Houseplants


NASA Guide to Air-Filtering Houseplants

Houseplants are not something you would typically associate with NASA, but in the late ‘80s the US government agency joined forces with the Associated Contractors of America (ALCA), to determine the most effective indoor plants for removing toxic agents from the air.

The study, led by Dr. B. C. Wolverton, found that some plants were effective at filtering out the likes of benzene, ammonia and formaldehyde from the air, helping to neutralise the effects of sick building syndrome.

The aptly named ‘Florist’s Mum’ proved most effective, alongside the Peace Lily, both shown to filter out amounts of benzene, formaldehyde, trichloroethylene, xylene, toluene and ammonia.

While the research does date back over 25 years ago, the findings are have stood the test of time, and are regarded as the most comprehensive and accurate results to date.


What’s In Our Air?


Like most chemicals, the adverse health effects you may encounter depend on several factors, including the amount to which you are exposed, the way you are exposed, the duration of exposure and the form of the chemical. Below are common symptoms associated with each toxic agent.

Trichloroethylene


Symptoms associated with short term exposure include excitement, dizziness, headache, nausea and vomiting followed by drowsiness and coma.
Formaldehyde

Symptoms associated with short term exposure include irritation to nose, mouth and throat, and in severe cases, swelling of the larynx and lungs.

Benzene


Symptoms associated with short term exposure include irritation to eyes, drowsiness, dizziness, headache, increase in heart rate, headaches, confusion and in some cases can result in unconsciousness.

Xylene


Symptoms associated with short term exposure include irritation to mouth and throat, dizziness, headache, confusion, heart problems, liver and kidney damage and coma.

Ammonia


Symptoms associated with short term exposure include eye irritation, coughing, sore throat.


For optimal air-filtering, NASA recommends placing at least one plant per 100 square feet of home or office space.

Please note: Several of these plants are known to be toxic to cats, dogs and other pets. If you are a pet owner, please do check the toxicity of plants before introducing them to your home.

Source by :https://www.lovethegarden.com/community/fun-facts/nasa-guide-air-filtering-houseplants

Monday, 29 February 2016

5 Best Herbs For Containers

Container gardening is a great way to have more control over your growing herbs. You can easily move the containers towards a warmer area if needed and back into the shade if the season gets too hot. Container herbs are more readily available for use when they are grouped together. You will be more apt to use them when they are right outside your kitchen door. Here are my 5 choices for a cook's theme container garden.

1.  Mint

Mint is notorious for getting away from the gardener. You plant one and soon twenty will follow. If you are trying to keep your varieties pure, cross pollination is easy to do if the strains are too close together. Containers can be placed far enough away from one another to keep your pineapple mint from suddenly tasting like catnip pineapple mint. Planting a bottomless pot into your garden is one way of controlling mint, but keeping it out of the garden completely, by using a separate container is a better idea. Mint is also  tasty, it can be used more often if it is handy. Keeping it pinched is how you keep it from going to flower and pollinating other mints. Mint is my first choice for container gardens.

2.  Sage

Sage is another plant that just does well if properly cared for. I find that it requires a lot of pinching and cutting to keep it from becoming woody too soon. As a rule, sage will need to be replanted after about 3 years since it will become woody stems with little leaves no matter what, so keeping it in a pot makes this change that much easier. Sage dries very well and if you pinch the leaves throughout the growing season, put a rubber band on them and keep them safe after drying, by the end of the season, you will have enough bundles to make an herb wreath! This makes a lovely gift with very little effort

3.  Rosemary

Rosemary is my favorite herb. It dries perfectly, holds its strong taste all winter, comes indoors and keeps growing in a sunny window and is rarely bothered by insects. I use rosemary for many herb standards or topiaries. The woody stem is perfect for crafting. The stem also seconds as skewers so I feel that each harvest yields two separate things: leaves and stems. I keep the stems in a freezer bag in my freezer and use them for grilling skewers. Since rosemary doesn't like to sit in water but likes to dry out between waterings, I think that being in its own container makes the herb grow that much hardier, since it can receive special care.

4.  Basil

Basil is one of the most rewarding herbs to grow in a container. It really lends itself well to the other popular container plant: the tomato. Basil likes to have plenty of water to keep its fleshy stems and tender leaves plump, but is susceptible to mildew. In a container, you can be sure the plant gets plenty of airflow. More »
 - Photo *copy; Flickr user Daxiang stef
Photo *copy; Flickr user Daxiang stef


5.  Thyme

Thyme is an often undervalued herb. Many times it gets planted and never used. Thyme deserves a higher standing on our list of culinary herbs! It will thrive in a container environment, needing only minimal watering. Some varieties grow into small shrub-like plants that enhance an entrance, and its tiny purple flowers are lovely. Being such a low maintenance herb, you can see how well thyme will fit in your container arrangement. No matter what variety of thyme you do buy, remember that it tends to become woody after a few years. Keeping it in a container also makes it easier to replace when needed. More »
Should You Grow a Container Herb Garden?


Herbs can be grown in container gardens so they are easily at your fingertips for cooking. Try different themes and plant a tea, cooking, healing container of herbs by the back door. You will be amazed at how much more your rely on them.

Source by: http://herbgardens.about.com/od/5bestherbsforcontainers/tp/BestHerbsContainers.htm

Sunday, 28 February 2016

Ivy Houseplants – Information On Caring For Ivy Plants


Ivy can make a wonderful, bright light houseplant. It can grow long and lush and bring a bit of the outdoors inside. Growing ivy indoors is easy as long as you know what makes an ivy plant happy. Let’s learn a little bit more about ivy and proper ivy plant care.

About Ivy Houseplants

Ivy houseplants can actually be one of several different varieties. These include:

English ivy (Hedera helix)
Irish ivy (Hedera hibernica)
Japanese ivy (Hedera rhombea)
Algerian ivy (Hedera canariensis)
Persian ivy (Hedera colchica)
Nepal ivy (Hedera nepalensis)
Russian ivy (Hedera pastuchovii)
English ivy cultivars are the most common type of ivy grown in the home, but all can be found if you look hard enough. Each of the varieties of inside ivy plants also come in several different cultivars. This means that there is a dizzying array of ivies that you can choose for your home, depending on your preference for color (all shades of green or variegated with white, yellow, gray, black and cream), leaf shape and growth habits.

Growing Ivy Indoors

Growing ivy indoors isn’t difficult as long as you provide what the plant needs. The most important part of indoor ivy plant care is light. All true ivies need bright light. Variegated cultivars can take medium light, but be aware that their variegation will become less pronounced in less light. Without enough light, inside ivy plants will become leggy and sickly looking. They will also be more prone to pests.
Indoor Ivy Plant Care

When watering your ivy, always check the soil before adding water. Ivies prefer to be kept slightly on the dry side, so let the soil dry out some (dry to the touch on top) before you water your ivy plant again. Also, make sure that your plant has excellent drainage, as ivy does not like to be in standing water or overly wet soil.

Caring for ivy plants should also include regular fertilizing. Fertilize your ivy about once a month in the spring, summer and fall with a water soluble, nitrogen-rich fertilizer. Do not fertilize in the winter, as this is the ivy’s dormant period and the fertilizer may do more harm than good at this time.

Ivy houseplants benefit from periodic washing to remove dust and pests from their leaves. To wash your ivy plant, simply place the plant in the shower and allow the water to run over the plant for a few minutes. If you find the plant has a serious pest infestation, you may need to bring the spray closer to the plant to help knock off all the pests.

Caring for ivy plants is easy and rewarding. You will enjoy not only growing ivy indoors, but will also have fun with the wide selection of ivy plants available to do so.

Source by : http://www.gardeningknowhow.com/houseplants/ivy/indoor-ivy-care.htm

Saturday, 27 February 2016

Best Indoor Plants According to Different Light Conditions


Want to grow indoor plants, but do you know how much light (direct or indirect) is required? Read this educative article on best indoor plants and their light requirements to find out

Use Light as a Guide for Selecting Plants for Indoors

If an indoor or house plant does not have appropriate light, nothing else you do for it will help. More water and fertilizer are not substitutes for inadequate light. So, when selecting a plant it is best to start with the available light, not the plant species.

Outdoor gardeners are familiar with light descriptors such as full sun, shade, partial shade, dappled light, etc. Those terms don’t translate well to indoor settings. What follows are detailed descriptions of the different categories of light found in most homes and offices and used by indoor plant professionals. Within each category, I have listed the commonly used plant species that are good in those different light conditions.

Low Light Plants


Low light is not NO light or light so dim you could not read comfortably. All plants, other than mushrooms, require at least some light and even the low light plants listed below require more light than most people realize. Low light is bright enough to read newsprint all day long. It is a location within a couple of feet of an uncovered north facing window and within 6 feet of a south facing uncovered window. Keep in mind that sheers, a porch overhang, large tree or tall building outside the window can substantially reduce the intensity of the light.

Here are the plants that do well in low light conditions:

Pothos
Dracaena ‘Janet Craig’
Dracaena ‘Lisa’
Dracaena Massangeana (Corn Plant)
ZZ Plant
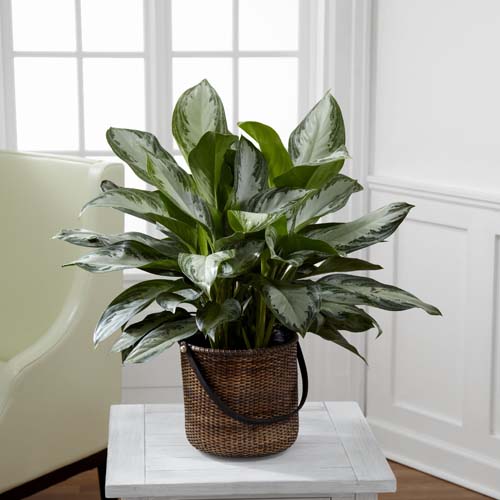
Chinese evergreen (Aglaonema)
Snake Plant (Sansevieria)
Peace Lily
Philodendron
Parlor Palm (Chamaedorea elegans)
Lucky Bamboo
Cast Iron Plant (Aspidistra)
You will note that this is not a long list and that is because there are so few plant species that have proven reliable in low light. Beware of retailers and plant labels that list other plant species as “low light”.

Artificial Light Plants


If the location you have in mind for a plant has no natural light at all, then it is still possible to grow the low light plants listed above. HOWEVER, it depends on the type of artificial light you have there. Standard incandescent and halogen bulbs produce light in the wrong part of the color spectrum to be useful for houseplants. They are not good as either the sole source of light or as a supplement to low natural light. Incandescent bulbs labeled as ‘Grow Lights’ are huge energy wasters and I don’t recommend them.

Fluorescent lights are adequate for the low light plants listed above. Overhead fluorescent lights used in many offices are excellent for most low light plants. The spiral CFL’s used in home lamps work moderately well if the plants are within a few feet of the bulbs.

LED’s are new on the market and can be color corrected for plant use, but they are still hard to find and identify.

Bright Indirect Light Plants


This is the light that you get just off to the side or just past the location from where the direct sun rays come through. It is also the light you get through any normally sunny window on a cloudy day. It is never more than a few feet away from any window.

All of the low light plants listed above will do even better in bright indirect light. However, those low light plants will suffer if exposed to the direct sunlight for even a couple of hours each day. Here are the plants that do well in bright indirect light:

Kentia Palm
Rhapis Palm
Bamboo Palm
Money Plant (Pachira)
Dracaena marginata
Phalaenopsis Orchid
African Violet
White Bird of Paradise
Areca Palm
English or Hedera Ivy
Schefflera
Rubber Plant (Ficus elastica)
Monstera
Sago Palm (Cycad)
Peperomia
Calathea
Dracaena Warneckei
Prayer Plant (Maranta)
Dieffenbachia
Anthurium
Alocasia
Bromeliad species
Most fern species

Low Sunlight Plants

Low sunlight location is where the plant would receive direct sunlight on the leaves for 2 – 4 hours per day, but no more.

Ficus benjamina
Ficus lyrata
Ficus alii
Norfolk Island Pine
Ming aralia (Polyscias)
Ponytail Palm
Wax Plant (Hoya)
Spider Plant
Dracaena arborea
Jade (Crassula)
Most succulents
Yucca
Asparagus Fern
Caladium
Alocasia
Aloe vera
Purple Passion (Gynura)
Date Palm (Phoenix dactylifera)
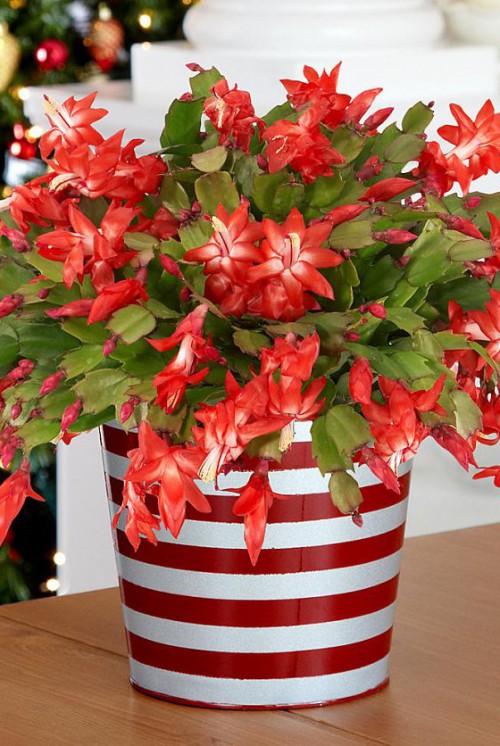
Christmas Cactus
Syngonium
Areca Palm
China Doll
Croton

Full Direct Sunlight Plants


Few homes and offices have locations with this much sunlight. This is a location very close to a large South or West facing window with no outside obstructions and no window coverings at any time during the daylight hours. This is too much light for any of the previously listed plants because this much direct light intensity will burn their foliage.

Note: Some of the plants listed here will also do quite well with a half day of direct sunlight.

Banana
Citrus trees
Coleus
Datura
Desert Rose
Euphorbia
Geranium
Begonia
Hibiscus
Kalanchoe
Madagascar Palm
Mandevilla
Zebrina
Purple Heart
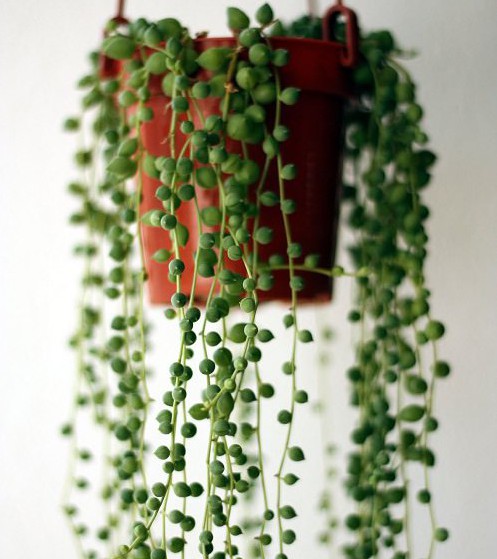
String of beads
Sweet potato vine
Most herbs
Succulents


Of course there are many other plant species not listed in this article. That is because they are not commonly used or available. Plants not listed often have specific requirements that make them problematic for most people. These requirements include very high humidity, cooler temperature and dormant periods. Select such plants carefully and be sure you understand the special challenges that come along with growing plants indoors.

Source by : http://balconygardenweb.com/best-indoor-plants-according-to-different-light-conditions/

Friday, 26 February 2016

Growing Healthy Orchids Indoors


Many orchids are rewarding indoor plants. Once a home owner has succumbed and bought his or her first orchid, or received one as a gift, meeting a few cultural requirements will coax the plant to flower again.

Orchids are far tougher and hardier than most people think, and are, by and large, extremely adaptable. There is a long-standing myth that orchids are difficult, if not impossible, to grow, especially without a greenhouse. With at least 20,000 species and some 100,000 artificial hybrids, there are some notoriously fussy orchids. But there are many rugged, popular, easy-to-grow types that adapt to the temperatures and light conditions found on the average home windowsill. Explore the options and assemble a collection that will put forth exotic flowers year-round.

Orchids are different from other houseplants. Unlike ferns, philodendrons, palms and Swedish ivy, orchids do not grow in soil. Potting an orchid in soil is actually one of the best ways to kill it. Most orchids in the wild are not rooted in the ground, but instead attach themselves by thick roots to the sides of trees and on branches. Clinging to the bark, the plants absorb water and nutrients from the air and rain and whatever drips down the tree. They are adapted to surviving when rain is scarce, hoarding water in thick leaves, stems and roots

.

Watering

In the house, orchids are grown in pots filled with chips of bark, stones, treefern or some other loosely packed material, which keeps roots well-aerated and permits water to drain quickly. Nothing -- repeat, nothing -- kills an orchid faster than letting it sit in a water-logged pot, since a lack of oxygen will cause the roots to suffocate and rot. Water orchids thoroughly, usually about once a week, then allow them to dry slightly before watering again. Orchids are better equipped to withstand periods of forgetfulness than they are to being overwatered.

Temperature

Another difference between orchids and many houseplants is that in nature most orchids experience a big difference between day and night temperatures. Manipulating the temperature of the home so it will drop at least 10 degrees at night, especially in autumn and winter when many orchids initiate buds, will induce the orchids to set flower buds more readily. Achieve this by lowering the temperature on the thermostat. This little trick can mean the difference between an orchid plant that merely lives, and one that thrives and flowers.

Orchids are usually classified as warm growing, intermediate and cool growing, with regard to their temperature needs. Many tolerate exposure to warmer or cooler temperatures without suffering damage. The temperature groupings refer to the lowest temperature the orchid prefers during winter nights. Warm-growing orchids, such as phalaenopsis, sulk if temperatures drop much below 60 F. Intermediate growers, such as cattleyas, prefer winter nights around 55° F. Cool-growing orchids, including cymbidiums and odontoglossums, are accustomed to winter nights of 50 F. At the other extreme, most orchids perform poorly when exposed to temperatures above 90° F.

Light 

Orchids are also classified into three other groups depending on the intensity of light they require -- high (3,000 foot-candles), medium (2,000 foot-candles) and low (1,000 to 1,500 foot-candles). Most orchids require plenty of light, preferably at least six hours a day. Many orchids can withstand more or less than the amount of recommended light, but providing more light enhances flowering potential. Conversely, inadequate light prevents orchids from flowering, although they will grow.

Leaf color indicates if the amount of light is adequate. The lush, rich, dark green of most houseplants is not desirable in orchid leaves. Dark green leaves are attractive, but signal there is not enough light. A grassy green color (light or medium green with yellowish tones) means the plant is receiving sufficient light to bloom. Gauge light intensity with this simple hand/eye test: Put your hand 6 inches above the leaves and look at the shadows cast. A sharp-edged shadow means high light; a soft-edged shadow indicates medium to low light; no shadow at all means the light is insufficient for an orchid to flower.

Southern- and eastern-facing windows work best for orchids; western windows canbe too hot in the afternoon; and northern ones are usually too dark. Too much direct light causes leaves to sunburn -- the leaves bleach out to white, ultimately dying and turning black -- so it may be necessary to reposition plants as the seasons change. Move plants away from or toward the window to manipulate the amount of light. A sheer curtain will cast light shade. Positioning sheets of Mylar or another reflective material in the growing area will increase usable light, a handy trick for the winter when light levels are often reduced.

Artificial Light 

Where windows with adequate light are unavailable, consider cultivating orchids beneath artificial light. Four 4-foot-long fluorescent tubes placed 6 inches apart side by side should do the trick. Two shop-light fixtures with cool-white bulbs will suffice. Special grow lights, sold under various trade names, are considerably more expensive and extend the light spectrum. The grow lights may reap better results, although data on this are conflicting. Place plants 6 to 8 inches below the tubes. Put the lights on a timer set to operate the bulbs for 14 to 16 hours a day. Many orchids, such as phalaenopsis and paphiopedilums, will be content. Orchids requiring more light, such as vandas and cymbidiums, however, need natural sunlight or high-intensity discharge lights to bloom. A fluorescent fixture in a dimly lit window adds extra light to natural sunlight, too, and can mean the difference between flowers and no flowers. Orchids that do not flower often require more light.

Fertilizing 

Orchids do not require abundant doses of fertilizer. However, to maintain healthy plants and see blooms on a regular basis, apply a weak solution of 20-10-20 fertilizer once a week. Each month, water with plain water to flush out any accumulated fertilizer salts. Dilute the fertilizer to one-quarter the strength recommended on the package. When in doubt, give less rather than more. Switch to a blossom-booster fertilzer in the autumn, when many orchids are initiating flower buds. Blossom-booster is a fertilizer ratio with higher phosphorus and lower nitrogen, such as a 10-30-20 formula. Many orchids are winter bloomers, which makes them even more special as houseplants. They fill an often otherwise flowerless void in the drabbest of months. Peak of orchid bloom usually occurs between December and April.

Humidity 

One of the things orchids greatly appreciate is adequate humidity. Fifty percent or more is necessary, but the atmosphere in most homes, especially those with dry, hot-air heat, is far below that. Raising the humidity around orchids will result in better flowering. Some tricks to increase humidity: operate a humidifier near the plants; place the pots on flat, black pebbles set in a tray in which water is added until it almost covers the stones ("Egg crate," which is the lattice-like plastic grid sold in hardware stores for suspension ceiling lights, is a good, more steady alternative to the pebbles.); group the orchids together; or cordon off the growing area with clear plastic (but continue to provide ventilation to prevent bacteria from becoming a problem).

The AOS thanks judywhite for this essay.

Source by : http://www.aos.org/Default.aspx?id=222

Thursday, 25 February 2016

Growing Indoor Orchids


To grow an orchid, you have to think like an orchid.

The golden rule for orchid success is to duplicate the plant's natural conditions as closely as possible. In nature, most orchids are epiphytes, meaning they grow on other objects, clinging to rough bark or even stone. The showy orchids favored by most people are usually either phalaenopsis hybrids (so-called moth orchids) or dendrobium hybrids.

These plants thrive in these conditions:

Strong light, but not direct late-afternoon sunlight (although dendrobiums can handle more sun)
High humidity
Turbulent air flow around the roots
Regular periods of drying, alternating with drenching rains
Temperatures between 50 degrees and about 85 degrees
The closer you can come to creating these conditions in your growing area, the more success and better blooms you will have.
Most store-bought orchids come packaged in cheap plastic pots with the roots packed in soaked moss. Obviously, this violates two of the main rules of successful growth. There is no air flow around the roots, and the roots are never given a chance to completely dry out. Thus, the plant cannot breathe and root rot is inevitable. Orchid roots are highly specialized organs designed to soak up water very quickly and breathe. They do not extract nutrients from soil.

Repotting for Success

The first step with any store-bought orchid is to enjoy the bloom. Don't attempt to repot a flowering plant.

After the bloom is done, go ahead and cut off the dead flower spike with sterile snippers and repot the plant.

Orchids should be potted into specialized orchid pots in orchid mixture. Orchid pots feature wide drainage slits so water will literally run through the pot. They are widely available. Orchid potting mixture is usually composed of several chunky ingredients, including pine bark, charcoal, and even styrofoam.


To repot your orchid, follow these steps:

Remove it from the plastic pot and carefully remove as much of the moss as you can. Healthy roots should be white and firm, with a small green growing point.
Cut away any shriveled, rotten or blackened roots.
Set the plant into the pot and fill in around it with potting mixture. The plant should be firmly situated, but it will not be completely anchored. Eventually, new roots will grow through the potting mixture and attach to the pot itself, thus anchoring your plant.
Once it's repotted, find a good spot. An east facing window with a few hours of mild morning sun is perfect. To provide the necessary humidity and catch run-off water, put the plant into a wide, deep tray and fill the tray with gravel.

Tips for Care


Caring for your orchid is pretty simple. During the summer months, water it weekly and heavily. Let the water drench the roots and fill up the pebble tray (this will provide extra humidity). It doesn't hurt every so often to even put the plant in the kitchen sink and really soak it down. Don't worry, you won't kill it as long as it's allowed to dry out afterward. During the growing season, feed it weekly with a weak solution of a powder or liquid fertilizer. Many growers use Peter’s 20/20/20 fertilizer at quarter strength.

In the winter, keep your plant warm and cut the water back to once a month or so. Mist it every so often to make sure it stays hydrated. Don't fertilize it.

If you see signs of distress, such as yellowing leaves, wrinkled leaves or no blooms, move the plant and keep tweaking your conditions. Once an orchid finds a happy spot, and falls into a routine, the plant should regularly throw out new roots and leaves or canes (depending on the type) and reward you yearly with a beautiful bloom
.
Source by: http://houseplants.about.com/od/growingorchidsinside/a/Orchidshouse.htm

Wednesday, 24 February 2016

Coleus—How to Grow Coleus Plants Indoors


Coleus are one of the rare plants that are grown almost exclusively for colorful foliage. In this regard, they're like crotons, but they're smaller and perhaps somewhat easier to grow inside. Coleus are truly in their glory in masses—their leaves are available in green, purple, orange, red, yellow, and in a striking array of patterns. Coleus are also fun plants to propagate; new plants grown from seed will be new creations.

Although I've given directions to grow them year-round, coleus are often grown as annuals and discarded once they become leggy.

Growing Conditions:


Light: Bright light, avoiding direct midday sunlight. Too much sun will wash out the colors in their leaves.
Water: Keep soil continuously moist throughout the year, but reduce watering in winter.
High humidity is preferred.
Temperature: Above 60ºF is preferred in the summer. In winter, above 50º is best.
Fertilizer: Feed in spring with slow-release pellets or weekly during growing season with liquid fertilizer.

Propagation:


By cuttings or seed. Cuttings will be identical to the parent plant, but newly seeded plants will be variable. Plants grown for propagation, however, generally do not look as good as ones grown exclusively for their foliage. The energy of flowering usually saps the plant of some vitality, which is why many growers pinch off flowers.

Repotting:


A large coleus will reach only 2-3 feet. They grow rapidly in the spring, but many people don't overwinter them, so they never bother repotting the plant.

If you choose to grow coleus for more than one season, you might consider trimming the plant back after the winter, refreshing the soil, and keeping it in the same pot. Alternatively, go up one pot size.

Varieties:


There are actually about 60 species of coleus, all native to Asia and Malaysia. However, virtually all of the coleus available are derived from the single C.
Blumei species, crossed with a few other species. Hybridizing work within this group has been extensive—there are literally hundreds, if not thousands, of cultivars. Buy a coleus for its leaves and don't worry too much about its parentage.

Grower's Tips:


Growing coleus indoors is definitely possible, providing you give it enough moisture, heat and humidity. If the plant goes into flower, snip off the unremarkable flowers to encourage vitality, and pinch off growing tips to encourage bushiness. Coleus tend toward brittle leginess, so they are best used in displays with other coleus or with other plants. If the plant starts to lose its leaves, it's probably too dark or cold. If the color washes out, it's probably getting too much sun.

Source by : http://houseplants.about.com/od/foliageplants/p/Coleus.htm